The Nothing Phone 1 is officially out, and it comes with a near-stock Android skin called Nothing OS, which allows you to use the amazing hardware with custom ROMs or other tweaks. Users who want to use these mods or want to modify their phone’s software usually look to unlock the bootloader, download TWRP, and root their device. We have shared a guide to unlocking the Nothing Bootloader and root Nothing Phone 1 with Magisk.
TWRP for the Nothing Phone 1 is not yet available, but it should be available soon. TWRP is only necessary if you intend to flash custom ROMs and kernels, install mods, take and restore NANDroid backups, and do other things. However, installing TWRP is not required in order to root your phone. If you do not intend to use these mods, you can skip this step and root your Nothing Phone 1 with Magisk.
Rooting your Nothing phone 1 using Magisk not only lets you run root apps but also enables you to make changes to your phone’s software systemless-ly. That is, without actually mounting or modifying the system partition. This method also enables you to easily install OTA updates on your Nothing Phone 1, even after rooting it.
Before You Begin
Let’s begin with a couple of tasks you should perform before proceeding with the instructions below.
1) Unlock Nothing Phone 1 Bootloader: In order to root, you must first unlock your device bootloader. This is really straightforward and may be done by executing a fastboot command from your PC. Check our previously published instructions for unlocking Nothing Phone’s bootloader.
2) Backup your device: Rooting doesn’t wipe off the phone data but unlocking the bootloader will. In any event, a full backup of all your crucial phone data and securing it is always a smart idea. If you need help, you can also refer to our detailed tutorial on Android backups.
3) Charge your phone: Maintain a sufficient charge on your device. To prevent it from shutting off in the middle, a minimum of 50% is advised. Although this measure isn’t mandatory, it’s highly advisable.
4) Install Device USB Drivers: You do not need to install additional drivers on your computer. When you connect your device to the PC, the appropriate USB drivers for your phone should be installed automatically. However, if your device does not detect, it is advisable to install the most recent device, USB drivers, on your computer.
How to Root Nothing Phone 1 with Magisk
So, without TWRP recovery, how can you root your Nothing Phone 1? You can easily install Magisk by patching the stock boot image and then flashing the resulting patched boot image back to your phone using Fastboot. The method is quite different than flashing the TWRP. However, we’ve simplified the process so readers can root Nothing Phone 1.
Step 1: Enable USB Debugging and OEM Unlocking
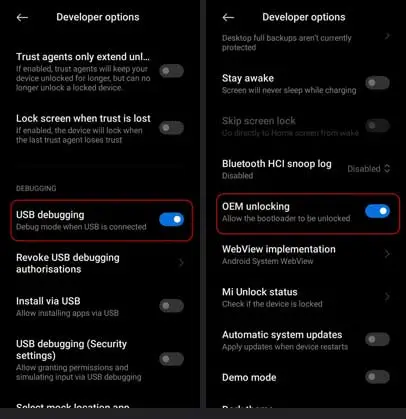
The first step in unlocking any device’s bootloader is to enable USB debugging and OEM unlocking. This switch has to be activated before the bootloader can be unlocked. The procedures to enable OEM Unlocking and USB Debugging for Nothing Phone 1 are shown below.
- Go to the device Settings.
- Scroll down and tap on About device.
- To enable Developer Mode, tap the build number seven times. When it’s finished, a toast message will appear.
- Head back to System Settings and then open Developer Options.
- In the Developer option, toggle the button next to USB debugging and USB Unlocking to enable it.
Step 2: Setup ADB and Fastboot On Nothing Phone 1
You must have the ADB and Fastboot tools installed on your PC in order to send the bootloader to unlock commands to the device. You may skip this step if you have previously installed it on your computer.
- Install ADB and Fastboot on your PC. (We have already written a detailed guide to set up ADB and fastboot on Windows and Mac).
- Now connect your phone to the Windows PC with a USB cable.
- In the Command Prompt window, enter the following command to initiate the ADB connection.
adb devices - You should see a prompt to allow or deny USB Debugging access.
- Select the Always allow from this computer option so you will not have to go through this process again.
- Tap OK to confirm.
- Enter the adb devices command again, and your device’s serial number should appear in the command window.
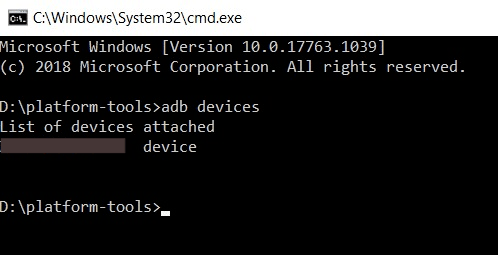
- Done. Now you can now run any ADB command on your device from your Windows PC.
Step 3: Get your phone’s stock boot image.
It is now time to obtain the boot image from the official firmware. You can get the latest boot image of Nothing Phone 1 by downloading the latest Nothing Phone 1 official OTA firmware and extracting it. You can find the boot.img right inside the recovery-flashable ZIP file. We also share the stock and Magisk patched boot images of all versions from below, so you don’t need to extract the firmware manually.
Step 4: Patch the stock boot image through Magisk Manager
For Magisk to work, you’ll need to patch the Nothing Phone 1’s stock boot image. To do this, download the latest version of the Magisk Manager app and install the boot image.
Note: From above you can also get the Magisk Patched boot images. If you find the patched images of your desired firmware, you can skip below step.
- Download the stock boot images from above and save them on your device.
- Download and install the latest Magisk app on Nothing Phone 1.
- Open the Magisk app and tap on the Install button.
- Choose Select and Patch a File. This should open the file selector, so navigate to the file and select it.
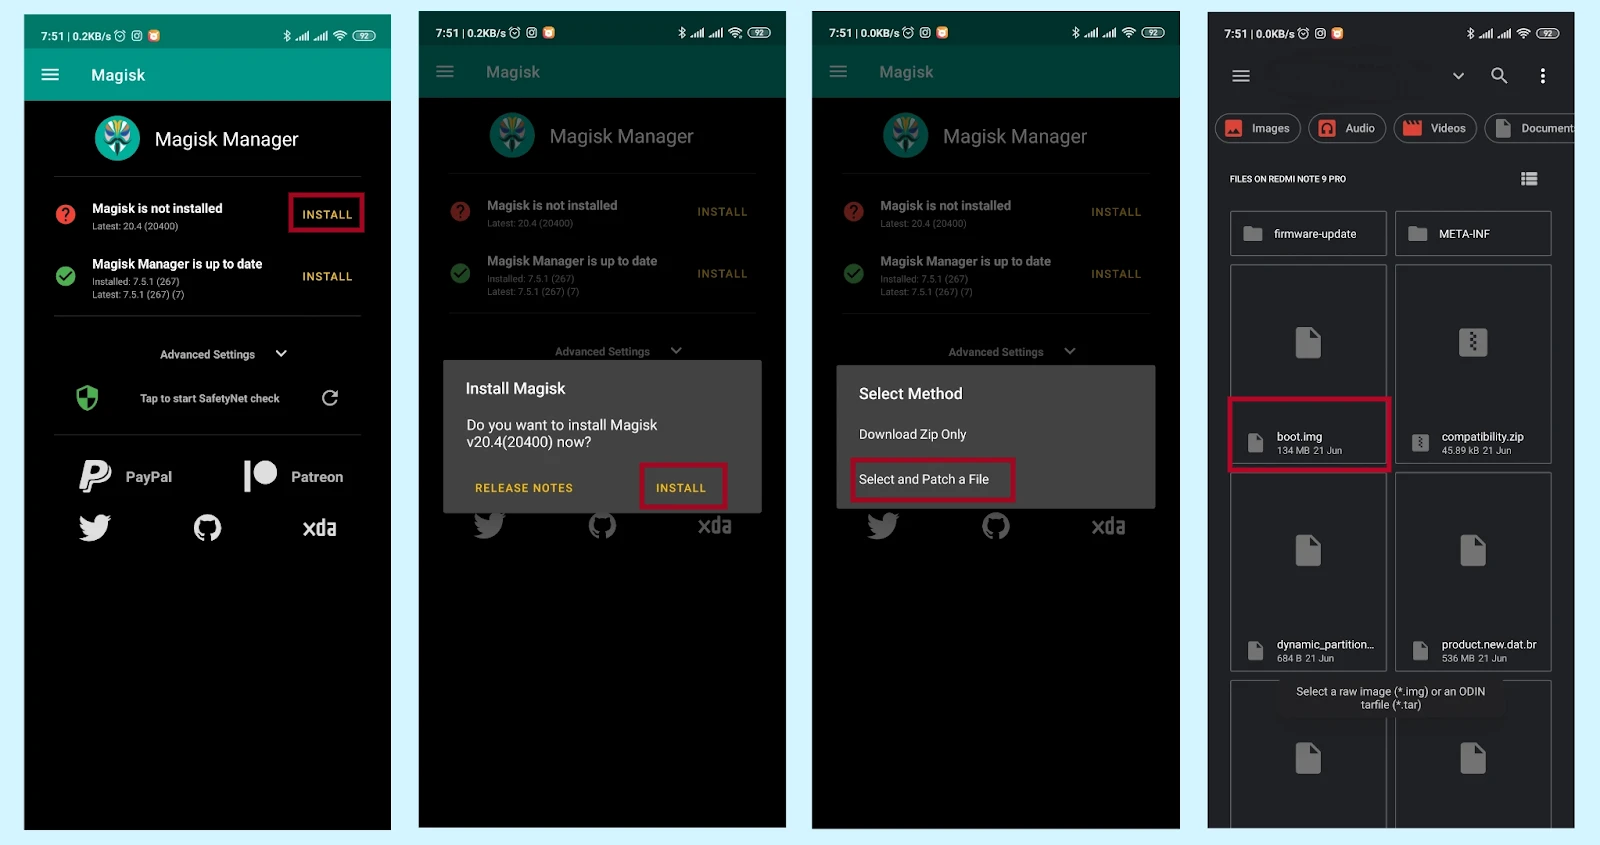
- Once the boot image is selected, press “LET’S GO!” to patch the stock boot image.
- When done, the patched boot image (magisk_patched.img) will be saved inside the Download folder of your phone’s internal storage.
- Now save the magisk_patched.img inside the platform-tools folder.
Step 5: Boot your device into Fastboot Mode
Fastboot can be used to send commands to the bootloader. It can connect with your phone and accept commands while in Fastboot Mode. There are several ways to get the Nothing Phone 1 into fastboot mode. You may use it by pressing the physical keys or sending an ADB command from your computer.
Note: Nothing Phone 1 Android 13 boot image is also avilable. Means, you can now also root Nothing Phone 1 Android 13 version.
- Now, connect your phone to the PC and reboot to the bootloader menu.
- You can do this by powering off the phone and holding the power and volume down buttons while booting up.
- You can also boot your Nothing phone into Fastboot Mode by entering the following ADB command.
adb reboot bootloader

Step 6: Flash the patched boot image to root Nothing Phone 1 using Magisk
Now that your device is in bootloader mode run the fastboot command to install the patched boot image and use Magisk to root your Nothing Phone 1.
- First, enter the following command in the PowerShell/Terminal window to ensure that your PC can communicate with the phone over the fastboot interface.
fastboot devices

- If you see a unique series of alphanumeric characters, it means the device has successfully booted to Fastboot.
- Enter the following fastboot command to flash the Magisk patched boot image and root your Nothing Phone 1.
fastboot flash boot magisk_patched.img

- Once the file has been flashed, reboot the phone using the following command:
fastboot reboot
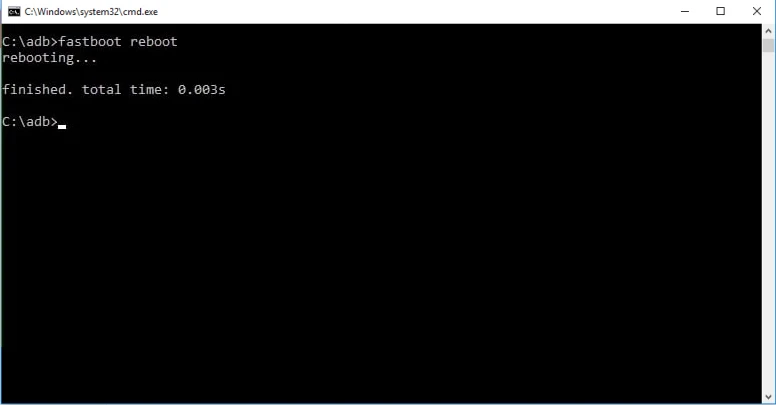
- Done. Your phone is now rooted with Magisk.
Step 7: Verify Root and SafetyNet Status
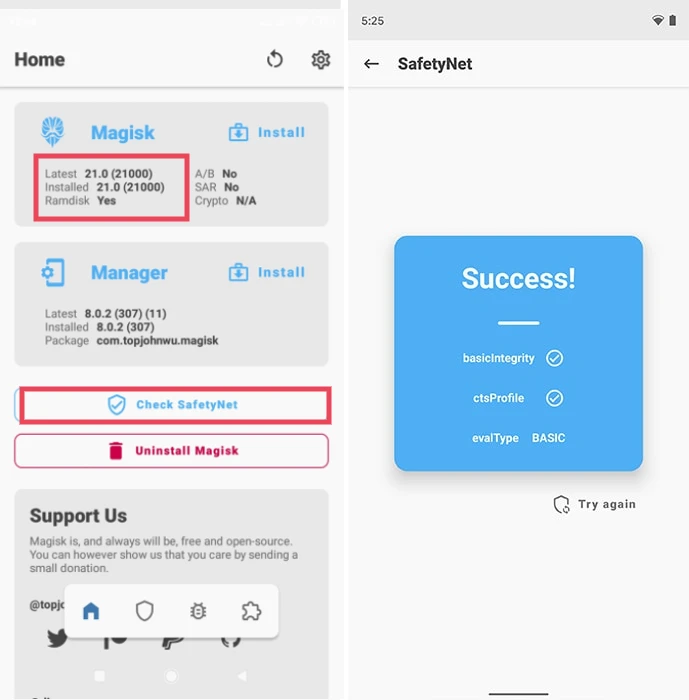
To verify the root status of your Nothing Phone 1, launch the ‘Magisk Manager’ app and check the installation status.
- Open Magisk Manager app.
- You will now see the Magisk installed on your device.
- You can further check if your rooted Nothing Phone 1 passes SafetyNet by pressing the Check SafetyNet button in Magisk Manager.
Wrapping Up:
Until a working TWRP build is available, rooting using the modified boot.img is the only option. However, following the procedure described above, you can easily root the Nothing Phone 1 with Magisk and use all the root features to improve device performance and add new features.

